
Building a Redder Bitterblossom
- PDH Home Base

- Sep 19, 2018
- 10 min read
Updated: Oct 19, 2021

Well. I have finally returned from the depths of My Day Job, and for no lesser occasion than to opine on the release of some new Commander 2018 goodies for us to play with.
It seems as though Wizards thought it a good opportunity to dig up the “Lieutenant” mechanic, but this time, we get it on uncommon creatures rather than rare. This poses something of a unique interaction in our format specifically, because the ability to play these cards as your commander guarantees the Lieutenant payoff simply by having it, and it alone, on the battlefield. While there has been some discussion among my contemporaries here at the PDH Homebase concerning which one is “best,” or “interesting” or “not the Red one”, I'm pretty sure I'm the man on an island, singing the praises of Loyal Apprentice.


First and foremost, Loyal Apprentice triggering off of itself at the beginning of your combat step basically equates to a (better) functional Bitterblossom out of the command zone. Not only that, but you don’t lose life per token, and those tokens have haste. Bitterblossom, historically, isn’t the most powerful effect at any given Commander table, but we need to take it back to square one and look at things differently when a slightly better version of that effect is available every game on the second turn, in a color where we are differently, and not less, equipped to capitalize.
Lean aggressive strategies are a big point of interest to me when it comes to EDH deck building, and I've put a lot of time over the years into learning and honing how these sorts of decks can exist and how they can be played. Naturally, a hasty 2/1 that brings along a second (and third, and fourth, etc.) hastey evasive body was just the thing to scratch that itch in pauper EDH, which has generally lacked such a streamlined option in the command zone.
Loyal Apprentice, as a commander, is primed to fill the role of the “Mad Dog” at the table. This is just how I term this specific vein of deck -- one that selects a player at the start of the game, based really on whatever criteria you find compelling, and just attacks them until they are dead, with little to no deviation. We’re a blunt instrument, but one that has a very significant effect on the dynamics of a four-player table. Decks that fall under this purview aren't the most intuitive for the average EDH player, and require the acceptance of several core truths of the archetype, much of which flies in the face of established EDH conventional wisdom.
So let’s go a little more in depth and cobble together a deck.
We are set up to be asking questions, not answering them. Devoting card slots to tools that don't have proactive applications is only going to hold us back.
The most important thing to realize with a deck like this is that we are in the business of deploying threats and not wasting time answering them. This is one of hardest frames of mind for any EDH player to fully commit to, since it goes against a ton of established understanding in terms of deckbuilding. Tradition has always stressed the importance of being able to interact with our opponents on an appropriate degree, relative to the power level of the table. Spot removal, counterspells, etc. are always seen as things that are necessary, even though the exchange rate in a four-player game is sub-par. We’re going to throw that all out the window.
With a deck like this, we are almost never going to wait to interact with our opponent. Instead of those reactive spells, we’re going to be utilizing things that put us firmly on the offensive. We will be the ones asking the questions, and requiring our opponents to have the answers. If they don’t, we capitalize. In the immortal words of Ivan Drago, “If he dies, he dies.”
As a general rule of thumb, by the end of our turn we want to have used all of our mana and attacked with all of our available creatures. Spells that don’t facilitate that goal are not what we are looking for. Any interactive spell we cast needs to be able to function independently and proactively. Since we are going to end up going wide with a large number of creatures and tokens, we can take strong advantage of cards like Weapon Surge and Rally the Forces.

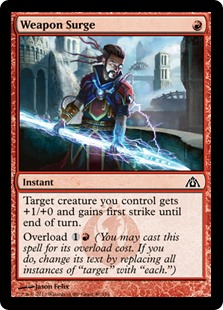

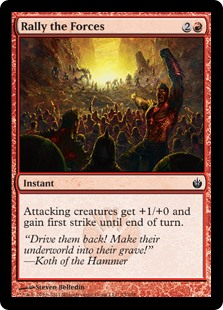
These are good examples of cards that are proactive, but also let us interact inside of combat. +1/+0 and first strike give our little guys the opportunity to trade up with stronger blockers, while also being fine in a situation where no one is blocking at all by pitching in some extra damage. This is the sort of tension and dynamic that we should be actively seeking.
There are cards that we are not going to be able to beat, full stop. Taking time or altering our primary strategy to play around those cards has a significant detrimental effect to our overall game plan.
Second, we need to come to terms with the cards that we simply won’t be able to beat. While we can devote slots in our deck to being able to play around these sorts of things, it serves us better to have a more streamlined deck, and play to our advantages rather than hoping we have the right answer at the right time, if there even is an answer. Pestilence is a great case study in how to approach this issue. If another player doesn’t deal with it for us, our role in the game ends. Since we can’t always rely on that scenario of our opponents bailing us out, we have to shift how we approach it. First, it’s important to first understand that the optimal way to beat Pestilence on our own is to keep it from hitting the battlefield at all. The surest way to do this, simply, is to kill our opponent before their fifth turn (the first turn, theoretically, that they will have the mana available to activate it), or come close enough that we can chip away for the rest of their life total (Loyal Apprentice having haste and creating tokens with haste is relevant here). This informs the direction we should to take when looking at specific cards to add to our deck.
Also, to take a look at the bigger picture, keep in mind that in order for Pestilence to be cast on turn four, it needs to be in the top 11 cards of our opponent’s deck. This number can fluctuate based on how many tools they have to dig it up, or how many opponents have the card in their deck, but generally speaking we don’t have to worry about it hitting the table every game on turn four, so we will often have a few extra turns to do our business. It’s a bit of a gamble every time, but this archetype specifically requires a few calculated risks backed up by a leap of faith here and there. The important takeaway, though, is that with this approach to dealing with an opposing Pestilence, we aren’t deviating from our primary game plan, and are able to use this philosophy to give further guidance on how we structure our deck to deal with other similar threats.
We are trying to follow a very specific play patterns with as much consistency as possible. Redundancy in the cards we use is a big focus for us.
Because decks like these are super linear, we are obviously going to be looking for a few specific effects that enable our strategy and finding as many functional copies of those effects as possible to give ourselves more consistency in how our games play out. However, even more than that, because our game plan here is so heavily front loaded into the first four or five turns of the game, we need to make very careful considerations for what we want those turns to look like, and derive our redundancies therein.
When framed properly, I think that there are three primary spell effects that we should look to maximize.

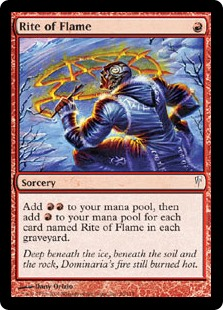

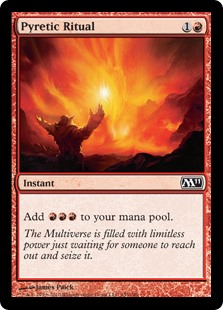

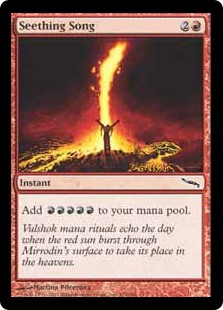
First, just by the nature of being an early game deck, we want to take advantage of as many red “rituals” as we can, such as Rite of Flame, Pyretic Ritual, and Seething Song. These are cards that let us really push our velocity, and thus spill our hand out onto the table as fast as possible. Also, importantly, they allow us, in certain scenarios, to cast multiple spells on the early turns and propel our tempo.
A lot of our creatures, just by the nature of our criteria, will end up being fairly unimpressive in a vacuum. By focusing mostly on creatures that excel in the early turns, we are giving up ground in other areas and our creatures will inevitably be outclassed. Oftentimes, we are only going to be contextualizing our opponents’ creatures with regard to their capacity as blockers. Against what we’re trying to do, that is going to be their primary function for our opponents. Because our creatures are generally going to scale much worse than theirs, we can turn to cards like Falter.

These are tools that allow us to set up very specific attack steps and can lead to enormous blowouts if our opponents spend time devoting resources to being able to block effectively, which will be the most common way that our opponents will be interacting with us. The simplest approach here will generally yield the best results -- we want to push through as much damage as possible through combat, so we need to make blocking as difficult as possible.
Employing this kind of effect also has implications on the creatures that we can run. For example, the need to front-load so much damage into our average draw really underscores the value of creatures that have a high power (not toughness!) to converted mana cost ratio. Cards like Jackal Pup or Bonded Construct serve as a good template here. Generally speaking, two power for one mana, three power for two mana, four power for three mana, etc. is what we’re looking for, as much as our curve will allow. Because we are devoting so many resources to pushing through blockers, we can look to profitably run cards like Jackal Pup and Bonded construct on the low end, and even up to things like Onakke Ogre. Remember: when our creatures go unblocked, it doesn’t matter how much toughness they have.
The final subset of effects that we’re going to lean on here to maximize our early tempo is an oft overlooked card (and personal favorite of mine) called Trumpet Blast.

I feel like this is a card that a lot of people sort of shrug off. While it is situational in a broader context, a deck like this is perfectly set up to not only reap huge gains from it, but also minimize the inherent risk of slotting into our deck in the first place. We are front loading most of our impact into an area of the game where our opponents will rarely have proper defenses set up, and not enough resources for either a strong blocking defense or adequate removal. Whereas Weapon Surge and Rally the Forces are similar effects, those are better situated first and foremost as interaction within combat while Trumpet Blast finds a more comfortable niche as a high efficiency burn spell to the opponent’s face, and we’re often able to cash it in for around
These three types of effects -- Trumpet Blasts, Falters, and rituals -- are what we are looking to capitalize on.
Have a plan, and execute as consistently and faithfully as possible.
In the interest of killing someone dead as fast as possible in every game we play with a deck like this, we need to have an understanding of how much damage we can expect to deal with any given card in our deck based on the conditions of any given turn we are playing. This is where it comes in handy to sit down and look at how you want your first, say, three or four turns of the game to look. In building this commander, for example, I started with the following as a brief, best-case outline in terms of what I am going to be trying to do as consistently as possible for my first three turns with the goal of having the most significant impact to table dynamics:
Mountain, cast a two-power one-drop creature, or one-power one-drop creature with evasion
Mountain, cast Loyal Apprentice, move to combat and create a Thopter, attack with all creatures (yield four to five damage, opponent at 25 or 26 life)
Mountain, move to combat and create a Thopter. Cast Trumpet Blast (yield 13-14 damage, opponent at 11 or 13 life)
The important aspect of this is to recognize a single spell or effect that will be something of a flashpoint for your particular deck and build around it to maximize effectiveness. In this context, I’ve chosen Trumpet Blast -- a card that requires set-up but has the highest ceiling in terms of how much damage it can represent. In order to cast the highest damage Trumpet Blast as consistently as possible, we want to maximize its effect when our opponents are the least prepared to interact with us and the manner in which we set it up. Thus, we have this specific three turn plan of action to give our deck focus.
While we are obviously engineering a scenario to limit interaction from our opponents, every game will play out differently and we may hit speed bumps here and there. However, it’s important to have a clear and concise expectation of what you want your deck to accomplish. When you start inserting caveats into your overall plan of action, it is easy to get muddled down with details that serve no purpose but to split the focus that we’ve worked so hard to ingrain into our deck. This is a really good practice to get into when designing any deck that need to function off of a powerful linear draw.
At this point, the rest of the deck can practically build itself. There is little ambiguity in terms of what will and will not fit our needs, and that’s one of the greatest strengths of this archetype. Sometimes it can be freeing to set aside trying to outplay your opponents, and instead force them to outplay you. In formats with such a large card pool, and where there is a lot of time spent whittling things down to find the most efficient iterations of complex interactions, there’s something about just attacking those folks to death with otherwise unplayable creatures that really hits the spot for me, personally. Building a well-oiled machine doesn’t have to be rocket science -- it just requires a clear and present objective and the will to follow through, regardless of how many moving pieces or interactions are necessary.
My current list can be found here.
-Derek
@PDH_Homebase


Comments